Simple Oracle 10g Rac setup
i am going to show you how to make a default oracle 10g RAC installation on oracle Linux 5.6 using Virtual Box. Our cluster will consist of two nodes using raw devices and ASM for shared storage.
Here are the details of each node of the cluster.
| Node1 | Node2 |
| Name: oralab1a Hostname: oralab1.localdomain Ram: 2.5 Gb Nics:Eth0: 192.168.1.151 #Public IP Eth1:192.168.1.152 #Private IP OS: Oracle Linux 5.6 x86_64 euk | Name: oralab2b Hostname: oralab2.localdomain Ram: 2.5 Gb Nics: Eth0: 192.168.1.156 #Public IP Eth1:192.168.1.157 #Private IP OS: Oracle Linux 5.6 x86_64 euk |
Important notes:
- The host machine should have at least 8GB of RAM to support the two nodes in the configuration.
- The software versions that i’m going to use are the 10.2.0.1. This installation guide should work for the other 10g patch sets.
- We are going to make use of the same user for the database home and the clusterware. Be familiar with the oraenv script to change homes.
- You should consider reviewing the official documentation if are making an installation for a production system.
- Make sure to keep the same nic for the public and cluster interconnect(private) across the nodes.
The installation will consists in the following steps:
- Download the required software.
- Creating the first node (oralab1b).
- Installing the operating system.
- Pre installation tasks for Oracle Clusterware.
- Creating the second node (oralab2b).
- Installing Oracle Clusterware.
- Installing Oracle database software and asm.
- Creating the RAC database.
PART I – Download the required software.
Download the software from the links below.
- Oracle VM virtual Box 4.2.
- Oracle Enterprise Linux 5.6.
- Oracle Clusterware 10g R2.
- Oracle Database 10g R2.
PART II – Creating the first node (oralab1b).
Once you have downloaded all the required software, proceed creating the first virtual machine. Just follow the screens as explanations below.
Click on create a new virtual machine type in the name as shown

Select the amount of memory

Choose to create a new hard drive
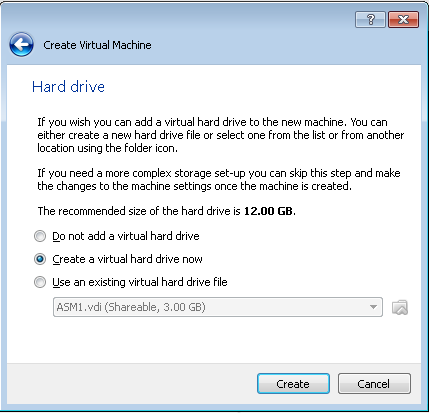
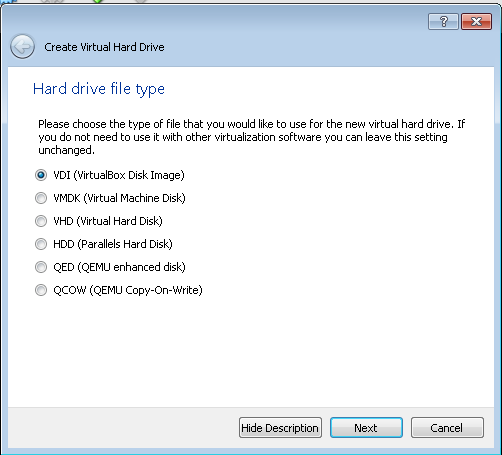
Select the type of hard drive you want
Now select you your virtual disk will be stored in the host machine.

Select the size and name for your hard drive.

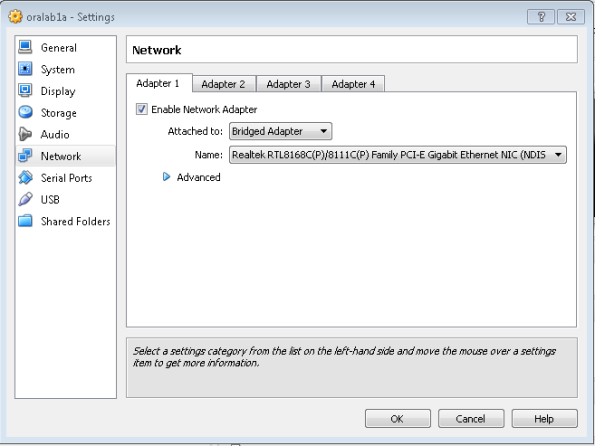
Once the Virtual Machine is created, go to settings and edit the network adapters. You will need at least two network interfaces per nodes and in briged mode.

At this point you have successfully created your first node called oralab1.
PART III – Installing the operating system.
Start up your virtual machine(VM) and select your installation media as follows.

Once the VM boots up, press enter to begin the installation

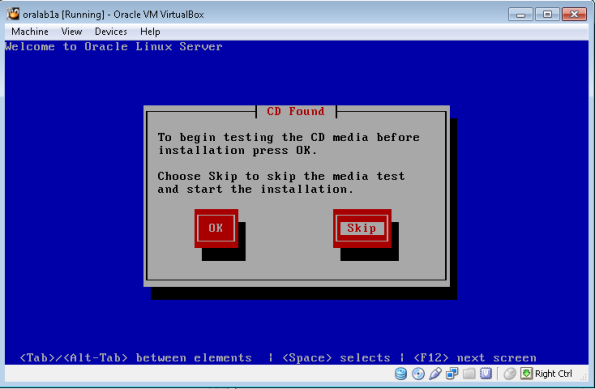
After some time you will be prompted to scan for errors in the installation media, just skip it.
When the anaconda installer is up and ready, just click next to begin.

Select your system and keyboard language


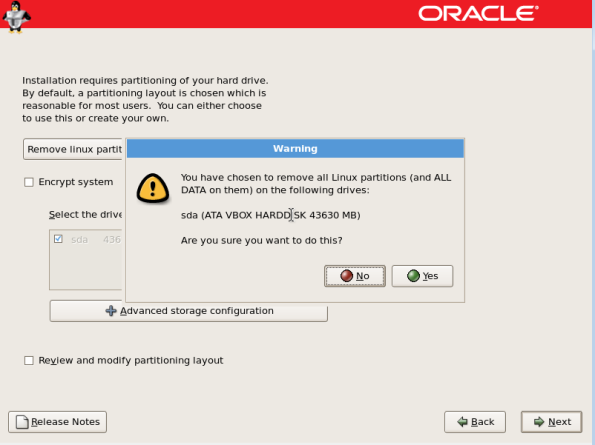
Next, select yes to erase all the data in the disks.

Create on next to leave the defaults

Click on yeas to remove all partitions and create the defaults
On the network session, just leave everything as it is and continue

Next, select your timezone.

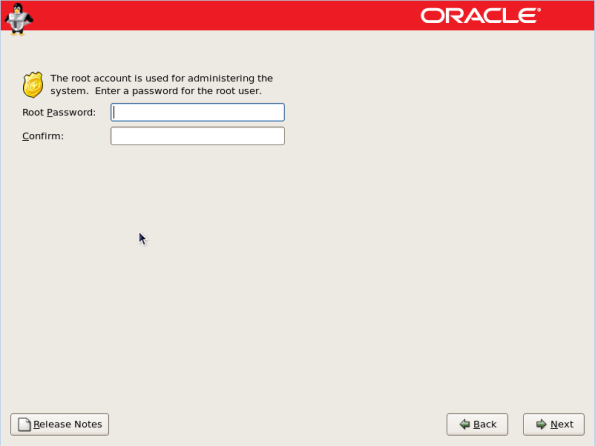
Now, select your root password.
In this section select customize now to select additional packages that you may like.

Next, select the oracle-validaded package from the menu

Now click next to begin the installation

Once it’s done, click reboot to continue.

Where the system is up a ready, click next to continue.
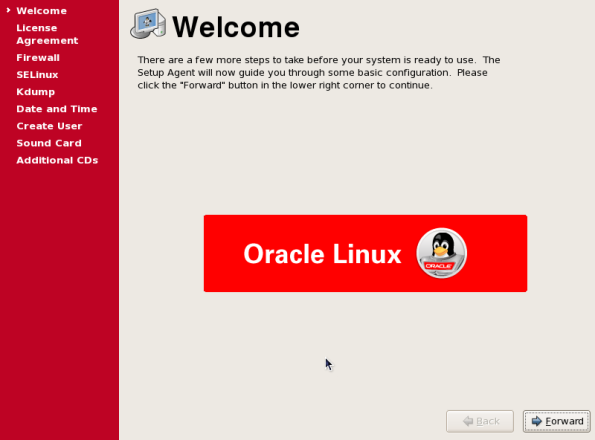
Agree to the License Agreement.

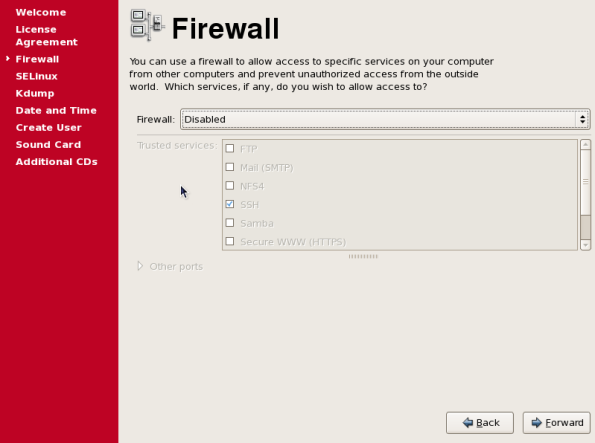
Disable the firewall
Disable Selinux.

Do not enable kdump.

Verify toy current time and date.

If you want to create additional users you can do it at this time or later if you prefer. The oracle-validated package that we selected before created the oracle user that we will use.

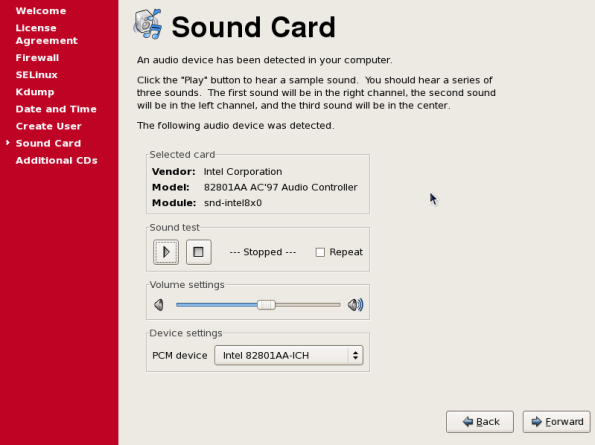
Verify your sound card.
We do not have additional cds, continue clicking forward
a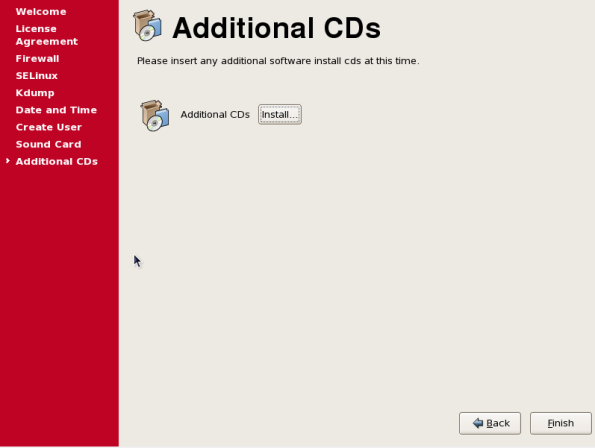
You will be prompted to reboot the system, proceed and wait until the system to reboot. At this point the operating system is installed.

PART IV – Pre installation tasks for Oracle Clusterware
Now that we have our operating system installed, login as the root. We have to make some modifications in the system in order to install the oracle clusterware.
First, let’s edit our network interfaces. Go to System/administration/network.

Select the interface eth0 and click edit to make the required modifications for our public interface.

Now, do the same thing with the interface eth1. This one is going to be the interconnect or private interface.

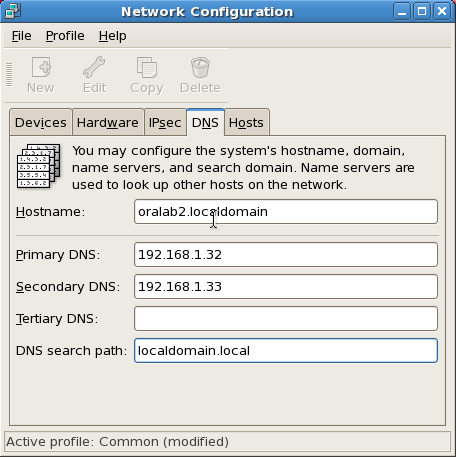
From the screen that you can select the interfaces, go to the DNS tab and type the hostname of the node and your DNS.

Save the changes and activate each interface with the activate icon.

Install VirtualBox Guest Additions.
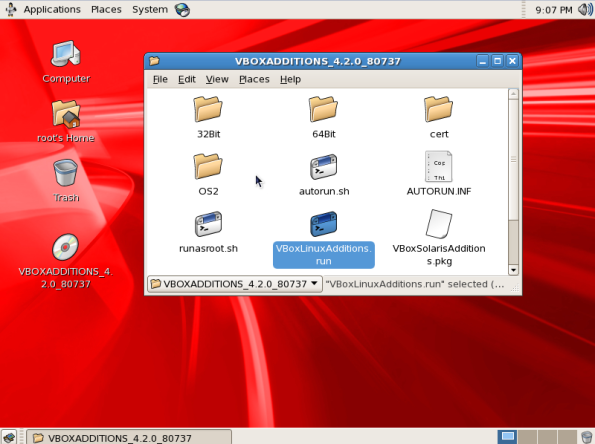

Reboot you system to let the virtual box guest additions do its magic. After the system boots up, login with the root user to keep making changes.
I will use Putty for the next steps but you can keep on using the terminal inside your Linux box.
Make sure you have your SElinux disabled by lookin the the file: /etc/sysconfig/selinux

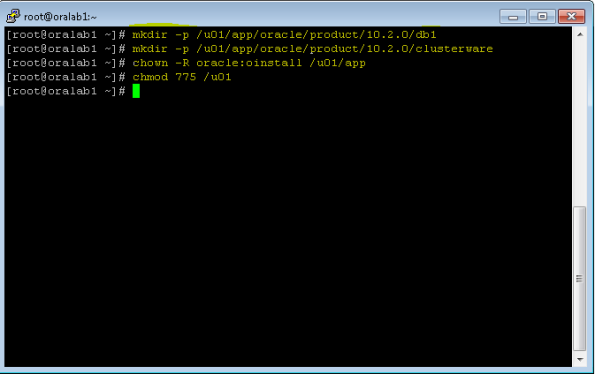
Create and required directories and set the permissions.
mkdir -p /u01/app/oracle/product/10.2.0/db1
mkdir -p /u01/app/oracle/product/10.2.0/clusterware
chown -R oracle:oinstall /u01/app
chmod 775 /u01
Create the environment variables for the oracle user.
vi /home/oracle/.bash_profile#VARIABLES ORACLE
export ORACLE_SID=orcl1
export ORACLE_BASE=/u01/app/oracle
export ORACLE_HOME=$ORACLE_BASE/product/10.2.0/db1
export PATH=$PATH:$ORACLE_HOME/bin
Note: Do the same for /home/oracle/.bashrc
Edit you hosts file with the following content.
vi /etc/hosts#IP PUBLICAS
192.168.1.151 oralab1.localdomain oralab1
192.168.1.156 oralab2.localdomain oralab2
#IP PRIVADAS
192.168.1.152 oralab1-priv.localdomain oralab1-priv
192.168.1.157 oralab2-priv.localdomain oralab2-priv
#IP VIRTUALES
192.168.1.153 oralab1-vip.localdomain oralab1-vip
192.168.1.158 oralab2-vip.localdomain oralab2-vip

Add the following line to the file /etc/rc.local to enable the kernel hangcheck
vi /etc/rc.local/sbin/insmod hangcheck-timer hangcheck_tick=30 hangcheck_margin=180

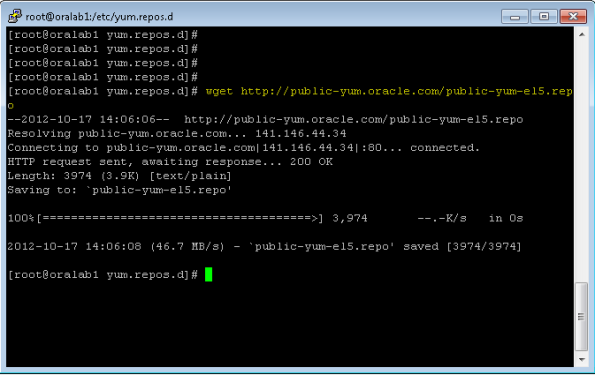
Configure the yum repositories as follows
cd /etc/yum.repos.d
wget http://public-yum.oracle.com/public-yum-el5.repo
Refresh the packages by issuing a yum update.
yum update
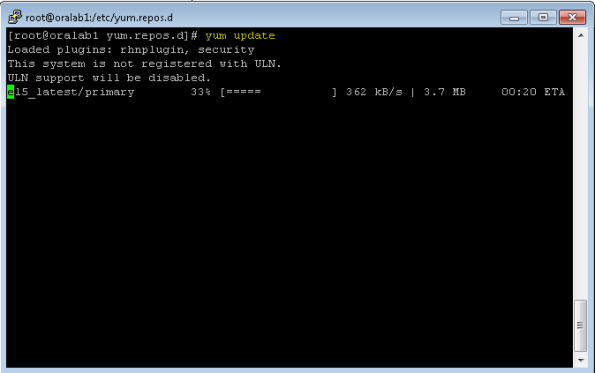
Note: You do not have to download all the packages, we just need it to refresh the repos.
Now lets install the required packages for oracle database and clusterware. Almost all the packages required are installed by oracle-validaded but to make sure we don’t miss anything install the following packages.
From the installation media/Server
From the installation media/Server
rpm -i gcc-3.2.3-34
rpm -i glibc-2.3.2-95.27
rpm -i compat-db-4.0.14.5
rpm -i compat-gcc-7.3-2.96.128
rpm -i compat-gcc-c++-7.3-2.96.128
rpm -i compat-libstdc++-7.3-2.96.128
rpm -i compat-libstdc++-devel-7.3-2.96.128
rpm -i openmotif21-2.1.30-8
rpm -i setarch-1.3-1
or
yum -y install gcc*
yum -y install glibc*
yum -y install compat-db*
yum -y install compat-gcc*
yum -y install openmotif*
yum -y install setarch*
After you finish installing the required packages, shutdown the system.
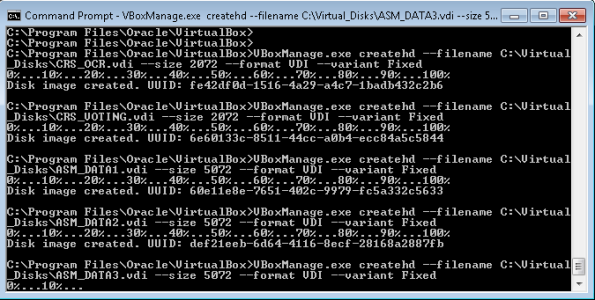
Next on the host machine you have to create the share disks that we are going to use. I am using windows as the host server, if you are on linux make sure to make the proper changes.
We will create five disks, two for the OCR and VotingDisk and three for ASM.
Execute the following commands.
Execute the following commands.
VBoxManage.exe createhd –filename C:\Virtual_Disks\CRS_OCR.vdi –size 2072 –format VDI –variant Fixed
VBoxManage.exe createhd –filename C:\Virtual_Disks\CRS_VOTING.vdi –size 2072 –format VDI –variant Fixed
VBoxManage.exe createhd –filename C:\Virtual_Disks\ASM_DATA1.vdi –size 5072 –format VDI –variant Fixed
VBoxManage.exe createhd –filename C:\Virtual_Disks\ASM_DATA2.vdi –size 5072 –format VDI –variant Fixed
VBoxManage.exe createhd –filename C:\Virtual_Disks\ASM_DATA3.vdi –size 5072 –format VDI –variant Fixed
VBoxManage.exe modifyhd C:\Virtual_Disks\CRS_OCR.vdi –type shareable
VBoxManage.exe modifyhd C:\Virtual_Disks\CRS_VOTING.vdi –type shareable
VBoxManage.exe modifyhd C:\Virtual_Disks\ASM_DATA1.vdi –type shareable
VBoxManage.exe modifyhd C:\Virtual_Disks\ASM_DATA2.vdi –type shareable
VBoxManage.exe modifyhd C:\Virtual_Disks\ASM_DATA3.vdi –type shareable
VBoxManage.exe modifyhd C:\Virtual_Disks\CRS_VOTING.vdi –type shareable
VBoxManage.exe modifyhd C:\Virtual_Disks\ASM_DATA1.vdi –type shareable
VBoxManage.exe modifyhd C:\Virtual_Disks\ASM_DATA2.vdi –type shareable
VBoxManage.exe modifyhd C:\Virtual_Disks\ASM_DATA3.vdi –type shareable
VBoxManage.exe storageattach oralab1a –storagectl “SATA Controller” –port 1 –device 0 –type hdd –medium C:\Virtual_Disks\CRS_OCR.vdi –mtype shareable
VBoxManage.exe storageattach oralab1a –storagectl “SATA Controller” –port 2 –device 0 –type hdd –medium C:\Virtual_Disks\CRS_VOTING.vdi –mtype shareable
VBoxManage.exe storageattach oralab1a –storagectl “SATA Controller” –port 3 –device 0 –type hdd –medium C:\Virtual_Disks\ASM_DATA1.vdi –mtype shareable
VBoxManage.exe storageattach oralab1a –storagectl “SATA Controller” –port 4 –device 0 –type hdd –medium C:\Virtual_Disks\ASM_DATA2.vdi –mtype shareable
VBoxManage.exe storageattach oralab1a –storagectl “SATA Controller” –port 5 –device 0 –type hdd –medium C:\Virtual_Disks\ASM_DATA3.vdi –mtype shareable
It should look like this
After you finish creating the disks, turn on you virtual machine log on as root and format each one of the disks as follows.
fdisk /dev/sdb
fdisk /dev/sdc
fdisk /dev/sdd
fdisk /dev/sde
fdisk /dev/sdf
Following the options
n,p,1,enter,enter,w

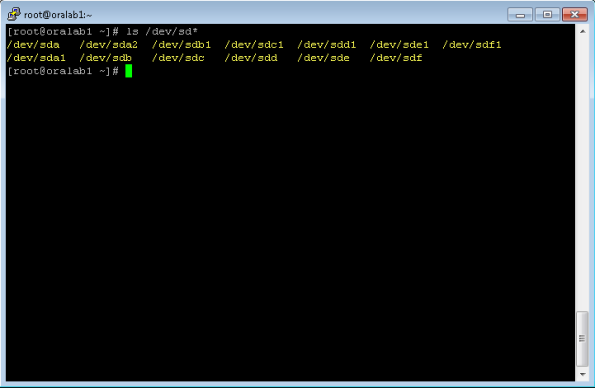
Verify that all the partitions are created with
ls /dev/sd*
Now let’s create the raw devices for the partitions we just created. Edit the file below and add the content.
vi /etc/sysconfig/rawdevices#DISCOS COMPARTIDOS
/dev/raw/raw1 /dev/sdb1
/dev/raw/raw2 /dev/sdc1
/dev/raw/raw3 /dev/sdd1
/dev/raw/raw4 /dev/sde1
/dev/raw/raw5 /dev/sdf1

Restart the raw devices service as follows
service rawdevices restart

Once again edit the file /etc/rc.local and add the lines below
chown oracle:oinstall /dev/raw/raw1
chown oracle:oinstall /dev/raw/raw2
chown oracle:oinstall /dev/raw/raw3
chown oracle:oinstall /dev/raw/raw4
chown oracle:oinstall /dev/raw/raw5

At this point the node1 is ready for the clusterware installation. Shutdown the node 1machine.
PART V – Creating the second node (oralab2a)
Now its time to create our second node of the cluster. To make things easier we will clone the primary disk from the node1 and then create a new VM with that disk.
Clone the node1(oralab1a) disk executing the following command in the host machine.
VBoxManage.exe clonehd “C:\Users\oracle\VirtualBox VMs\RAC 10G OEL 5.6 x86_64\oralab1a\oralab1a.vdi” “C:\Virtual_Disks\oralab2b.vdi”
Note: remember to make the necessary changes according to your host operating system.
Now create the second virtual machine.
Follow the screenshots.

Select the amount of memory

Select the disk you created.

Once you’ve created the new VM, make the proper changes to the network adapters.

Add the second one.

Atach the share disks to the new VM
VBoxManage.exe storageattach oralab2b –storagectl “SATA Controller” –port 1 –device 0 –type hdd –medium C:\Virtual_Disks\CRS_OCR.vdi –mtype shareable
VBoxManage.exe storageattach oralab2b –storagectl “SATA Controller” –port 2 –device 0 –type hdd –medium C:\Virtual_Disks\CRS_VOTING.vdi –mtype shareable
VBoxManage.exe storageattach oralab2b –storagectl “SATA Controller” –port 3 –device 0 –type hdd –medium C:\Virtual_Disks\ASM_DATA1.vdi –mtype shareable
VBoxManage.exe storageattach oralab2b –storagectl “SATA Controller” –port 4 –device 0 –type hdd –medium C:\Virtual_Disks\ASM_DATA2.vdi –mtype shareable
VBoxManage.exe storageattach oralab2b –storagectl “SATA Controller” –port 5 –device 0 –type hdd –medium C:\Virtual_Disks\ASM_DATA3.vdi –mtype shareable
It will look like this.

Startup the VM, once is up loging as root and make the following changes.
Change the networks interfaces to the proper ips.

Note: Delete all the .bak interfaces.

Change the hostname at the DNS tab and save your configuration as you did with the node 1.

Restart the network services with root as shown
service network restart

Edit the file /home/oracle/.bashrc and .bash_profiles and make the proper changes as follows

At this point the second node will be ready. Start up the first node (oralab1) and login as oracle to configure the ssh password less login.
Execute the following commands from the node 1
ssh-keygen -t rsa
#Accept the default values

From node2 do the same
ssh-keygen -t rsa
#Accept the default values

From node 1 execute the following commands.
cd ~
cd .ssh
cat id_rsa.pub >> authorized_keys
scp authorized_keys oralab2:/home/oracle/.ssh/

From node 2 execute following
cd ~
cd .ssh
cat id_rsa.pub >> authorized_keys
scp authorized_keys oralab1:/home/oracle/.ssh/

From node 1 and node 2 execute the following
ssh oralab1.localdomain date
ssh oralab1-priv.localdomain date
ssh oralab2.localdomain date
ssh oralab2-priv.localdomain date
ssh oralab1 date
ssh oralab1-priv date
ssh oralab2 date
ssh oralab2-priv date

At this point the nodes are ready for the clusterware installation.
PART VI – Installing Oracle Clusterware
From the node 1 as oracle user create the staging directory for the software to install
mkdir -p /u01/app/oracle/stage
Now unzip and extract the clusterware software.
gunzip 10201_clusterware_linux_x86_64.cpio.gz
cpio -idmv < 10201_clusterware_linux_x86_64.cpio
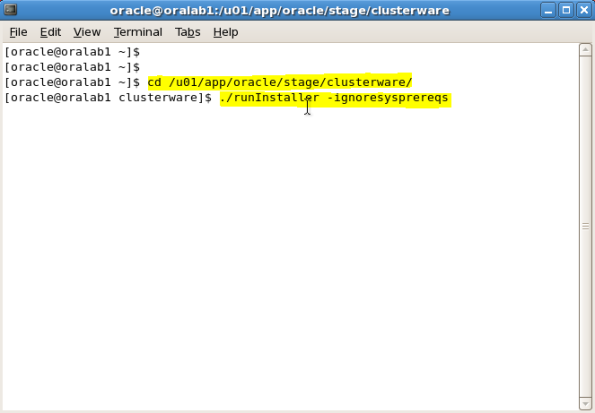
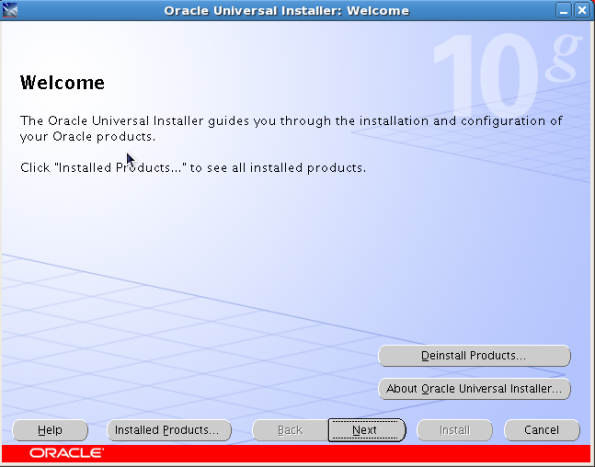
After extracting the software a directory called clusterware will be created, get inside and launch the OUI with the options ignoresysprereqs.
./runInstaller -ignoresysprereqs
Once the installer loads up, click next to continue the installation.

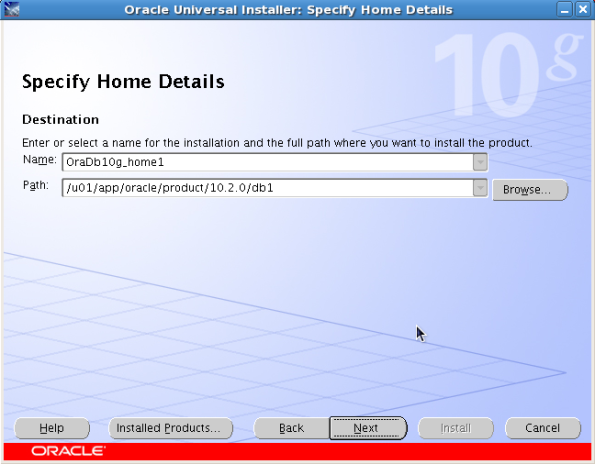
Leave the inventory the the default location

Specy the CRS_HOME or the oracle clusterware home. Use the one shown in the screenshot.

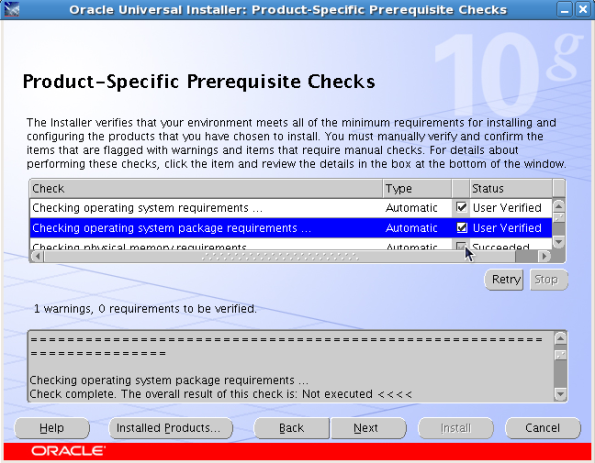
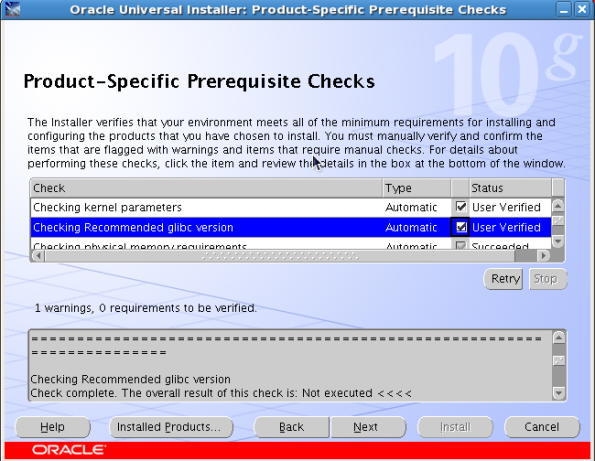
In the next screen some of the prerequisites will fail, this is because we are making an installation in a non-supported version of the OS.
Next, you will specify some usefull information about the cluster, like the cluster name and the nodes that it will have.

Click on add to specify the details of the second node.
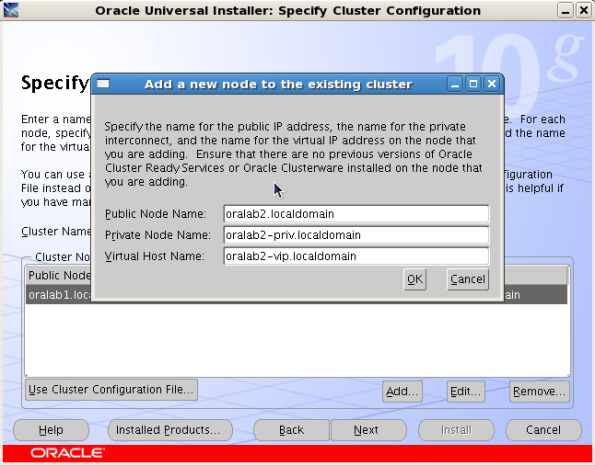
It should look like this

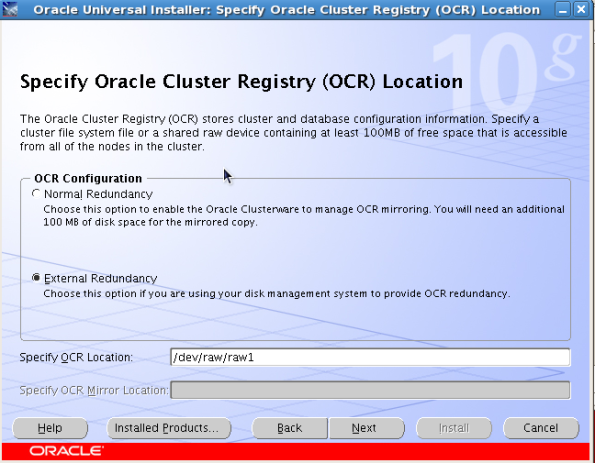
Next, you will specify the location of the ORC. This will be our first raw disks.
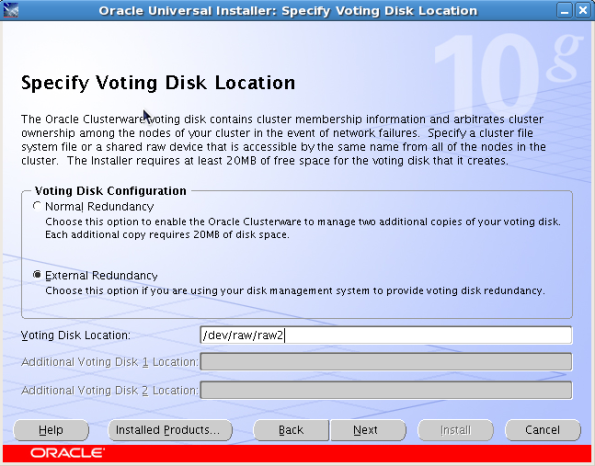
Now spacify the location of the votingdisk in our second raw disk.
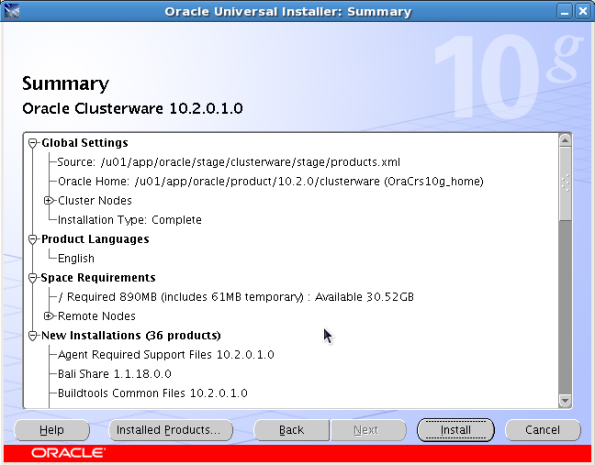
In the next screen you will see the summary of the installation, click install to begin.

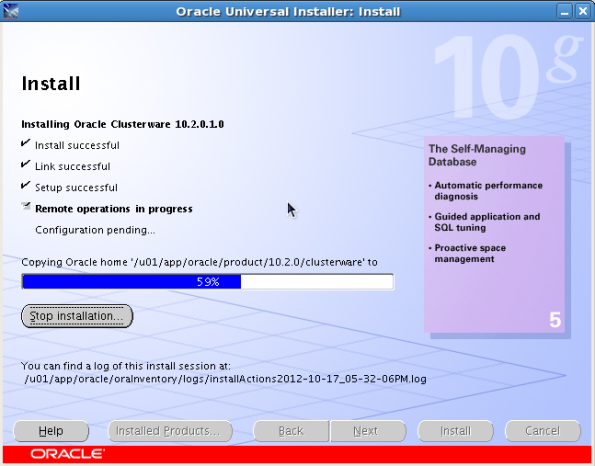
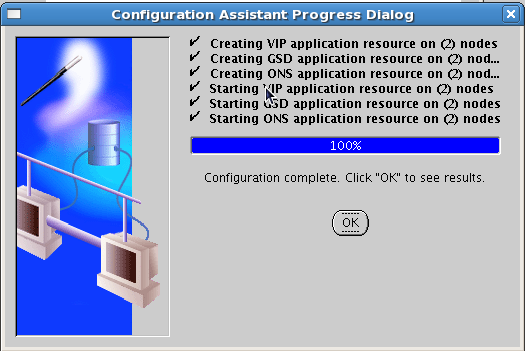
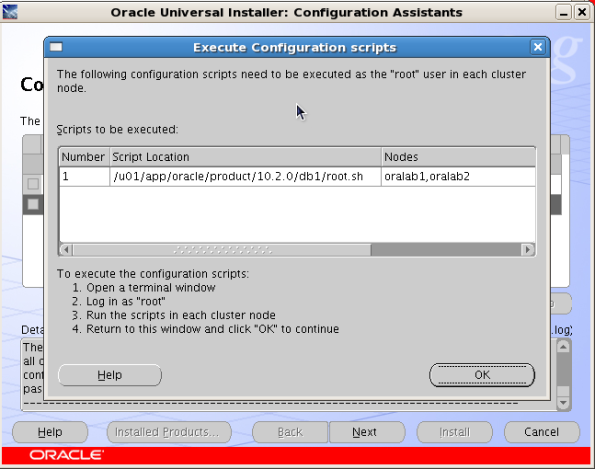
At some time in the installation you will be prompted to execute some scripts as root in every node of the cluster. Execute each scripts in the following order.
Execute script 1 in node 1(oralab1) then in node2(oralab2)
Execute script2 in the same order.

Here is the output of the script 2 in the fisrt node.

If after executing the script 2 in the second node, you encounter the following error:
Error while loading share libraries: libpthread.so.0: cannot open shared object file: No such file of directory
This means that the installer could not create the VIPs or virtual IPs, we will have to create them manually.

Here is a workaround for this.
Make your way to the $CRS_HOME/bin that is our case /u01/app/oracle/product/10.2.0/clusterware/bin and edit the file vipca
vi /u01/app/oracle/product/10.2.0/clusterware/bin/vipca
Make your way to line 124 or close and unset the LD_ASSUME_KERNEL variable as follows.

Save the change and edit the file srvctl making the same change. In this file go to line 176 or close.

After you make the change, copy those file to node2 (oralab2) with scp as follows.

Now when you execute vipca you’ll get this error

To resolve this, execute the following from the CRS_HOME/bin
From node 1(oralab1)
./oifcfg setif -global eth0/192.168.1.151:public
./oifcfg setif -global eth1/192.168.1.152:cluster_interconnect
From node 2(oralab2)
./oifcfg setif -global eth0/192.168.1.156:public
./oifcfg setif -global eth1/192.168.1.157:cluster_interconnect
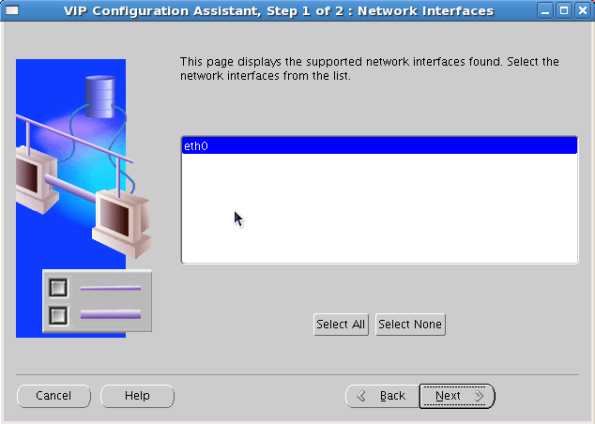
Now execute VIPCA
./vipca

Select the public interface, it should be the only one displayed
Make the proper changes for the VIPS.
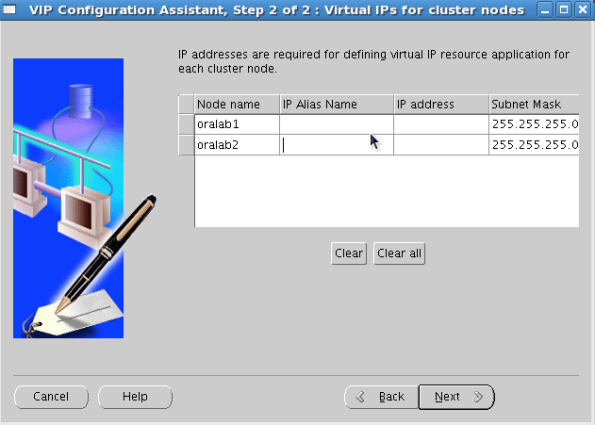
Note: Remember that our VIPs will consists in
192.168.1.153 oralab1-vip.localdomain oralab1-vip
192.168.1.158 oralab2-vip.localdomain oralab2-vip
192.168.1.158 oralab2-vip.localdomain oralab2-vip
After you complete the required fields click next and you’ll see this.
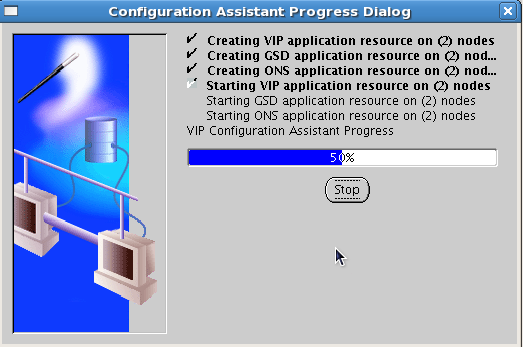
Go back to the installer and the installation will proceed.

Click exit to finish.

To verify the components that we have at this moment execute this.

At this point we have our cluster installed and working.
PART VII – Installing oracle database software and asm
Now that we have our cluster up and ready, we can begin the oracle database software.
Unzip the files under the same directory you used for the clusterware
cd /u01/app/oracle/stage
gunzip 10201_database_linux_x86_64.cpio.gz
cpio -idmv < 10201_database_linux_x86_64.cpio
cd database./runInstaller -ignoresysprereqs

For this installation we are going to use a single ORACLE_HOME for ASM and for the RDBMS. Specify the ORACLE_HOME path and continue.
Select the nodes from the cluster.

Select configure Atomatic Storage Management and specify the password for sys.

Next you’ll have to create a disk group with the remaining raw disks that we created. Create it, as shown below

Next review the installation summary and let the installer run.


As you did with the clusterware installation, run the scripts as root on each node of the cluster.
When done, click exit to finish

Let’s check the resources one more time to verify everything is working.
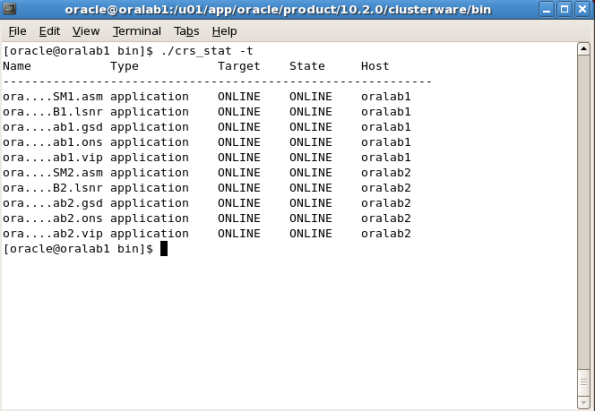
Good, ASM and all other components are working as we spected. Let’s create the RAC database.
PART VIII – Creating the RAC database.
From any node of the cluster as the oracle user lauch the dbca and select to create a cluster database
dbca

Clisck create to proceed

Select the node from the cluster where you want your database runs on.

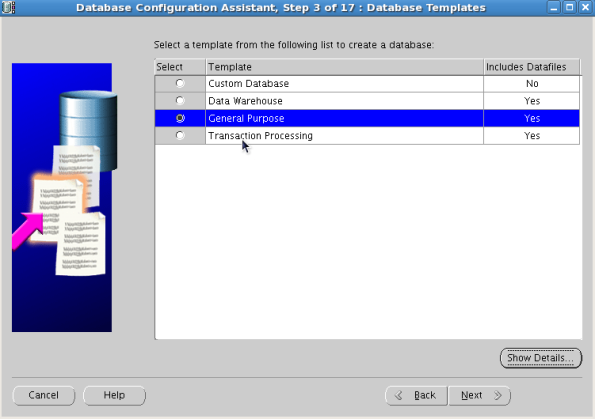
Select the template you want to use for your database
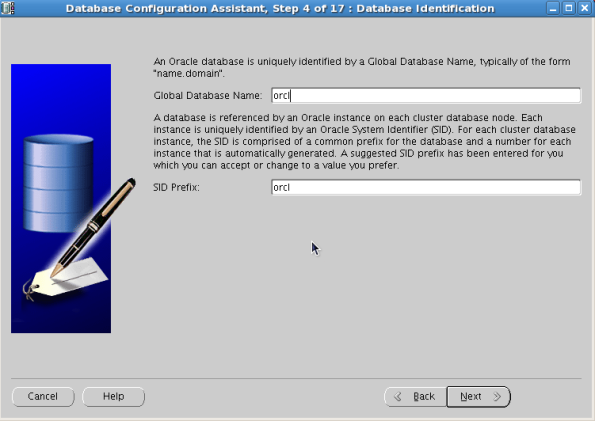
Type in the database name and sid.
Select to configure enterprise manager and continue

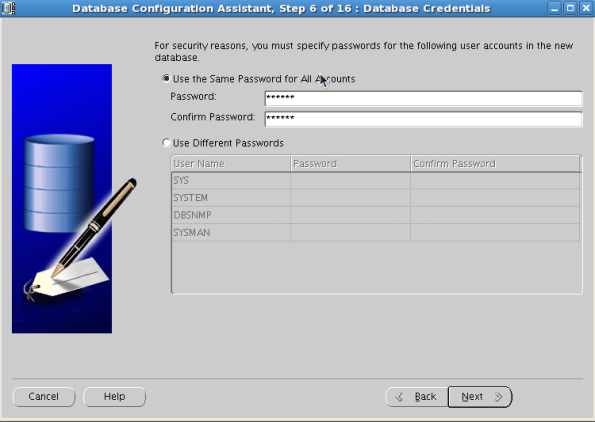
Choose the sys and system password and continue
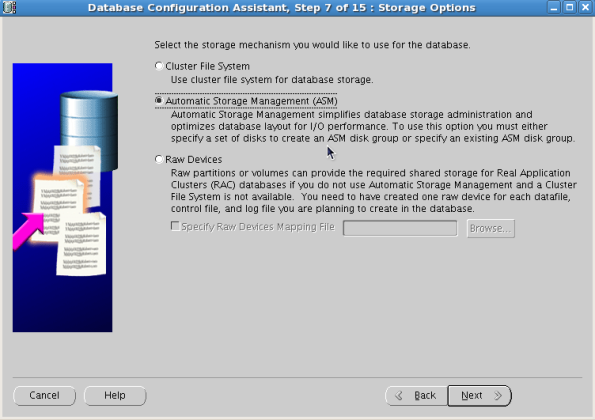
On the database storage options screen, select ASM for your storage.
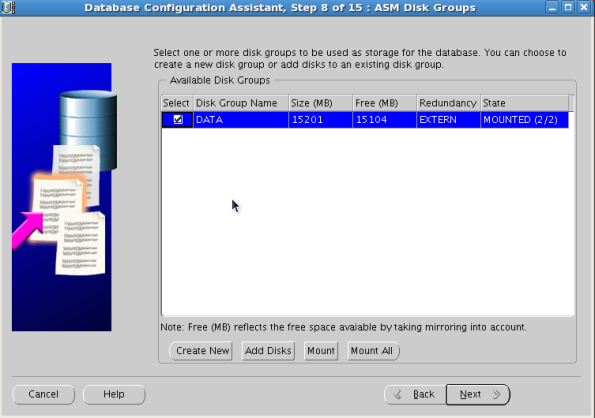
Select the disk group that we created before.
Select Oracle-managed to let oracle organize our database files.

Choose your recovery options

Do not include the sample schemas

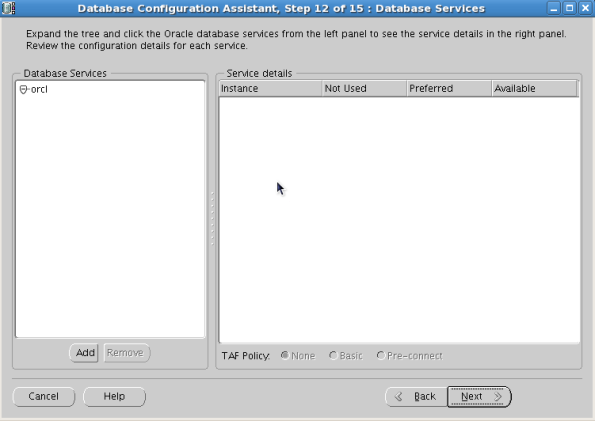
Create a service for your database if you want. For now let’s move on.
Specify the amount of memory your instances will have

As we did specify the oracle-manage-files before, we do not need to worry about the location of the database files because the will reside and be organized inside the diskgroup

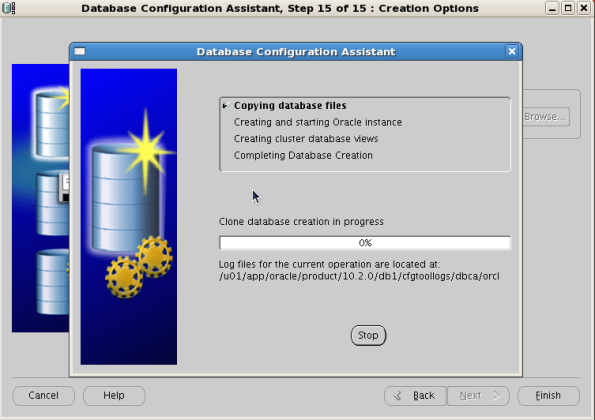
Click finish to begin the installation

Review the summary and click ok to begin.
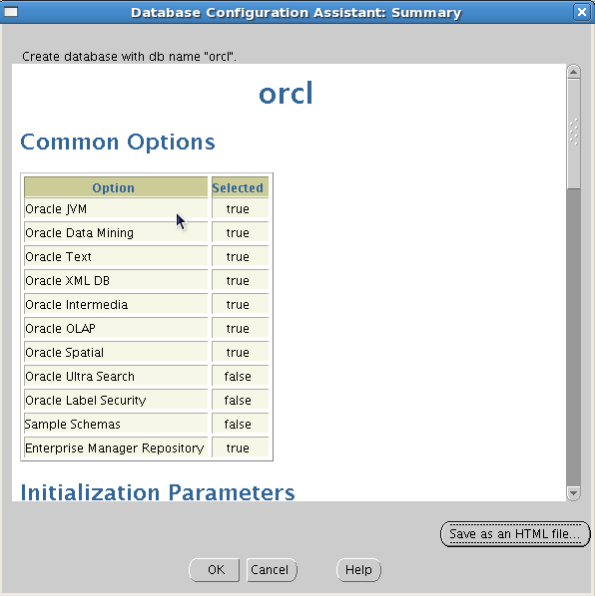

Once its done, click exit to proceed
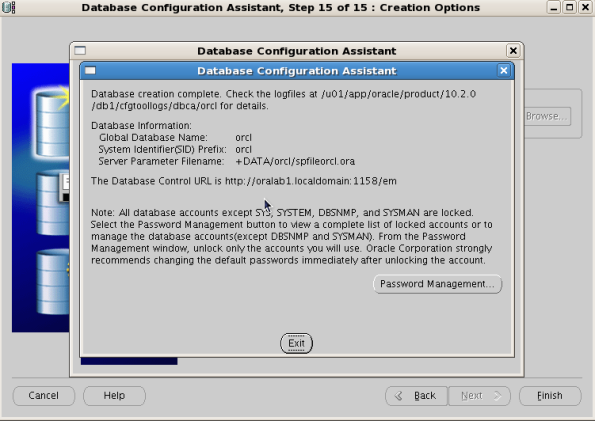

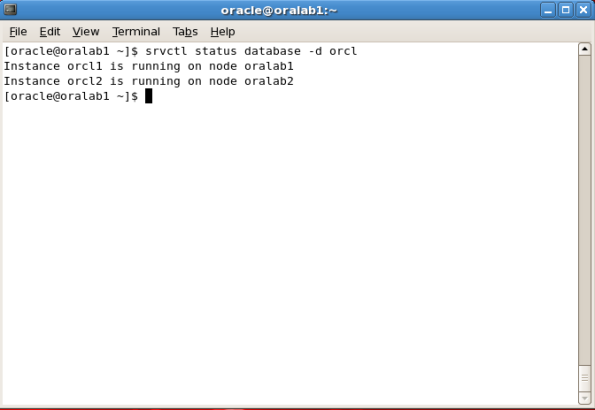
Our database has been created. Let’s revify that with the server control
srvctl status database –d orcl
Now with sqlplus
sqlplus / as sysdba

Let’s verify all the resources for the last time
From the clusterware home. ./crs_stat -t

Now with the database control


Done!! We just installed Oracle Real Application cluster 10g on linux 5 using virtualbox 4.


Comments
Post a Comment