vertica Database installation
Installing Vertica is fairly simple. With the following steps, we will try to understand a two-node cluster:
- Download the Vertica installation package from http://my.vertica.com/ according to the Linux OS that you are going to use.
- After downloading the installation package, install the package using the standard command:
- For
.rpm(CentOS/RedHat) packages, the command will be:rpm -Uvh vertica-x.x.x-x.x.rpm - For
.deb(Ubuntu) packages, the command will be:dpkg -i vertica-x.x.x-x.x.deb
Refer to the following screenshot for more details:
Running the Vertica package - In the previous step, we installed the package on only one machine. Note that Vertica is installed under
/opt/vertica. Now, we will set up Vertica on other nodes as well. For that, run the following command on the same node:/opt/vertica/sbin/install_vertica -s host_list -r rpm_package -u dba_usernameHere,–sis the hostname/IP of all the nodes of the cluster, including the one on which Vertica is already installed.–ris the path of the Vertica package and–uis the username that we wish to create for working on Vertica. This user has sudo privileges. If prompted, provide a password for the new user. If we do not specify any username, then Vertica createsdbadminas the user, as shown in the following example:[impetus@centos64a setups]$ sudo /opt/vertica/sbin/install_vertica -s 192.168.56.101,192.168.56.101,192.168.56.102 -r "/ilabs/setups/vertica-6.1.3-0.x86_64.RHEL5.rpm" -u dbadmin Vertica Analytic Database 6.1.3-0 Installation Tool Upgrading admintools meta data format.. scanning /opt/vertica/config/users Starting installation tasks... Getting system information for cluster (this may take a while).... Enter password for impetus@192.168.56.102 (2 attempts left): backing up admintools.conf on 192.168.56.101 Default shell on nodes: 192.168.56.101 /bin/bash 192.168.56.102 /bin/bash Installing rpm on 1 hosts.... installing node.... 192.168.56.102 NTP service not synchronized on the hosts: ['192.168.56.101', '192.168.56.102'] Check your NTP configuration for valid NTP servers. Vertica recommends that you keep the system clock synchronized using NTP or some other time synchronization mechanism to keep all hosts synchronized. Time variances can cause (inconsistent) query results when using Date/Time Functions. For instructions, see: * http://kbase.redhat.com/faq/FAQ_43_755.shtm * http://kbase.redhat.com/faq/FAQ_43_2790.shtm Info: the package 'pstack' is useful during troubleshooting. Vertica recommends this package is installed. Checking/fixing OS parameters..... Setting vm.min_free_kbytes to 37872 ... Info! The maximum number of open file descriptors is less than 65536 Setting open filehandle limit to 65536 ... Info! The session setting of pam_limits.so is not set in /etc/pam.d/su Setting session of pam_limits.so in /etc/pam.d/su ... Detected cpufreq module loaded on 192.168.56.101 Detected cpufreq module loaded on 192.168.56.102 CPU frequency scaling is enabled. This may adversely affect the performance of your database. Vertica recommends that cpu frequency scaling be turned off or set to 'performance' Creating/Checking Vertica DBA group Creating/Checking Vertica DBA user Password for dbadmin: Installing/Repairing SSH keys for dbadmin Creating Vertica Data Directory... Testing N-way network test. (this may take a while) All hosts are available ... Verifying system requirements on cluster. IP configuration ... IP configuration ... Testing hosts (1 of 2).... Running Consistency Tests LANG and TZ environment variables ... Running Network Connectivity and Throughput Tests... Waiting for 1 of 2 sites... ... Test of host 192.168.56.101 (ok) ==================================== Enough RAM per CPUs (ok) -------------------------------- Test of host 192.168.56.102 (ok) ==================================== Enough RAM per CPUs (FAILED) -------------------------------- Vertica requires at least 1 GB per CPU (you have 0.71 GB/CPU) See the Vertica Installation Guide for more information. Consistency Test (ok) ========================= Info: The $TZ environment variable is not set on 192.168.56.101 Info: The $TZ environment variable is not set on 192.168.56.102 Updating spread configuration... Verifying spread configuration on whole cluster. Creating node node0001 definition for host 192.168.56.101 ... Done Creating node node0002 definition for host 192.168.56.102 ... Done Error Monitor 0 errors 4 warnings Installation completed with warnings. Installation complete. To create a database: 1. Logout and login as dbadmin.** 2. Run /opt/vertica/bin/adminTools as dbadmin 3. Select Create Database from the Configuration Menu ** The installation modified the group privileges for dbadmin. If you used sudo to install vertica as dbadmin, you will need to logout and login again before the privileges are applied. - After we have installed Vertica on all the desired nodes, it is time to create a database. Log in as a new user (
dbadminin default scenarios) and connect to the admin panel. For that, we have to run the following command:/opt/vertica/bin/adminTools - If you are connecting to admin tools for the first time, you will be prompted for a license key. If you have the license file, then enter its path; if you want to use the community edition, then just click on OK.
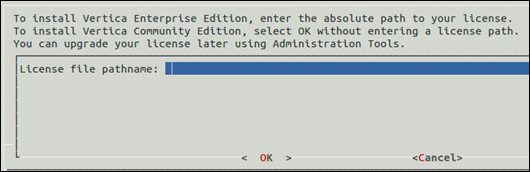
License key prompt - After the previous step, you will be asked to review and accept the End-user License Agreement (EULA).
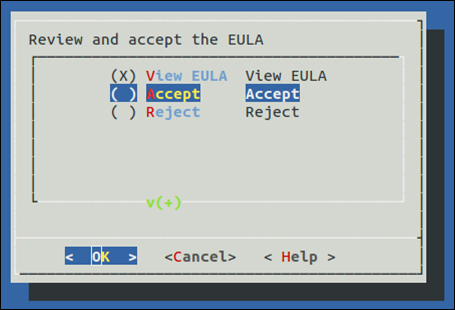
Prompt for EULAAfter reviewing and accepting the EULA, you will be presented with the main menu of the admin tools of Vertica.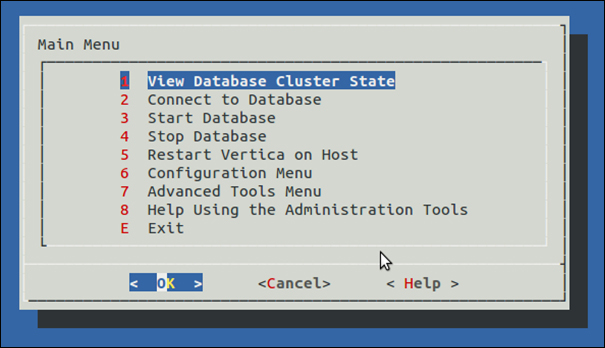
Admin tools main menu - Now, to create a database, navigate to Administration Tools | Configuration Menu | Create Database.
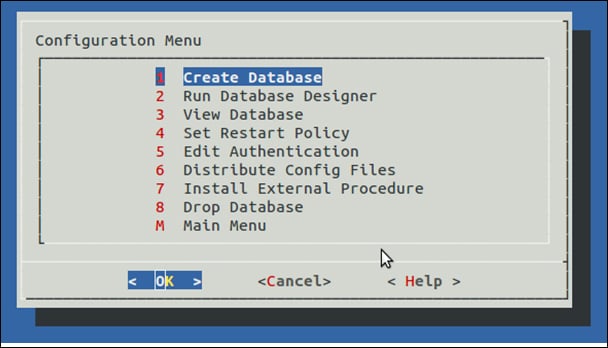
The Create Database option in the configuration menu - Now, you will be asked to enter a database name and a comment that you would like to associate with the database.
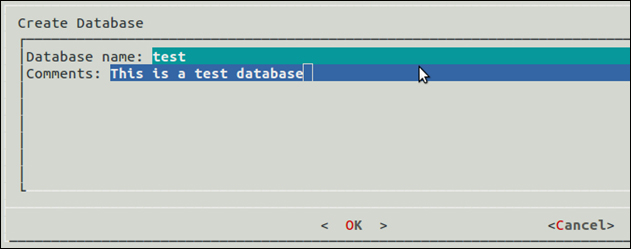
Database name and comments -

Password for the new database - After entering and re-entering (for confirmation) the password, you need to provide pathnames where the files related to user data and catalog data will be stored.
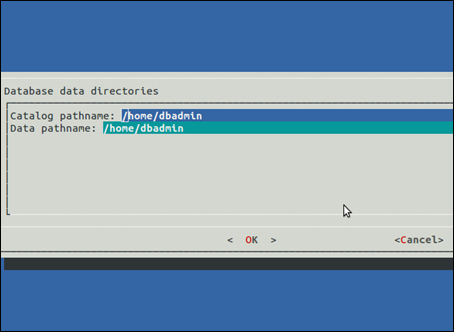
Catalog and data pathnamesAfter providing all the necessary information related to the database, you will be asked to select hosts on which the database needs to be deployed. Once all the desired hosts are selected, Vertica will ask for one final check.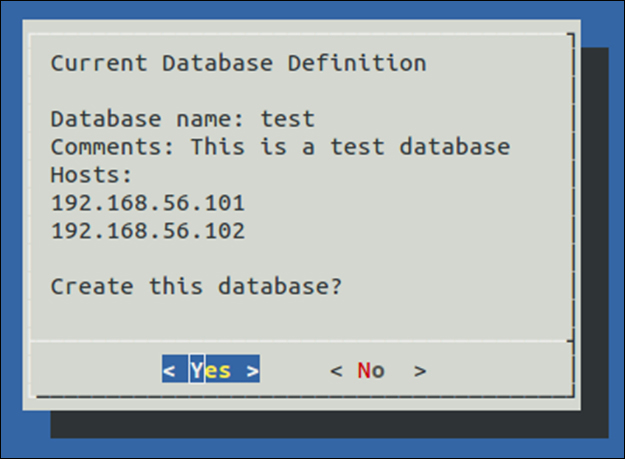
Final confirmation for database creation -
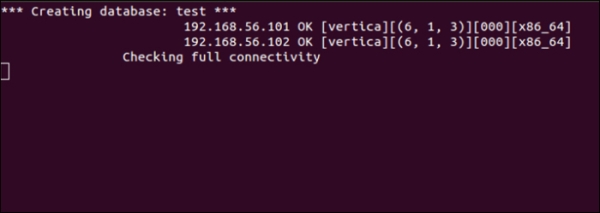
Database creation - Once the database is created, we can connect to it using the VSQL tool or perform admin tasks.


Comments
Post a Comment